Friday, March 5, 2021

.NET Interactive in GCP AI Platform Notebooks via a Container

In my last post, I showed how to setup F#, C#, and PowerShell within Google Cloud AI Platform Notebooks using a manual approach. Another option is to create a notebooks instance from a container that includes .NET Interactive pre-installed.

To accomplish this, do the following:

1. Enable applicable GCP APIs (Cloud Build, Artifact Registry, AI Platform Notebooks, etc.), if they are not already enabled.

2. Open the GCP Cloud Shell Terminal.

3. In Cloud Shell, create a file named Dockerfile (e.g. nano Dockerfile), copy/paste the following into the file, and save.

4. Build the container with a command such as the following (Note: Replace the “REPLACE_WITH_PROJECT_ID” placeholder with your GCP Project ID):

5. Create a new Notebooks instance via gcloud or the AI Platform Notebooks console. Note: Replace the “REPLACE_WITH_PROJECT_ID” placeholder with your GCP Project ID.

6. Once the notebook instance is created, open JupyterLab and F#, C#, & PowerShell options will be available.


Monday, February 15, 2021

F# on GCP AI Platform Notebooks

In my last post, I showed how to use F# in Google Colab via installation of .NET Interactive. 

Today I'll walk you through how to wire up .NET Interactive within Google Cloud AI Platform Notebooks. AI Platform Notebooks provides secure, managed JupyterLab instances. This combined with .NET Interactive enables a first class experience in AI Platform Notebooks for F#, C#, and PowerShell.

Setting up GCP AI Platform Notebooks

1. Log into Google Cloud Console and open AI Platform (Unified)

2. Select Notebooks in the left nav

3. Create a new instance with Python 3 as the base.


4. Once the instance creation process finishes, click the OPEN JUPYTERLAB button.


5. Open a terminal from the Launcher.


6. In the terminal, run the following to install the .NET SDK:

7. Now install .NET Interactive with the following:

8. Close the terminal window and JupyterLabs.

9. In GCP AI Platform Notebooks, reset the instance.


Launching .NET Notebooks

Now that the initial setup steps are complete, the launcher in JupyterLab will include F#, C#, and PowerShell notebook options.


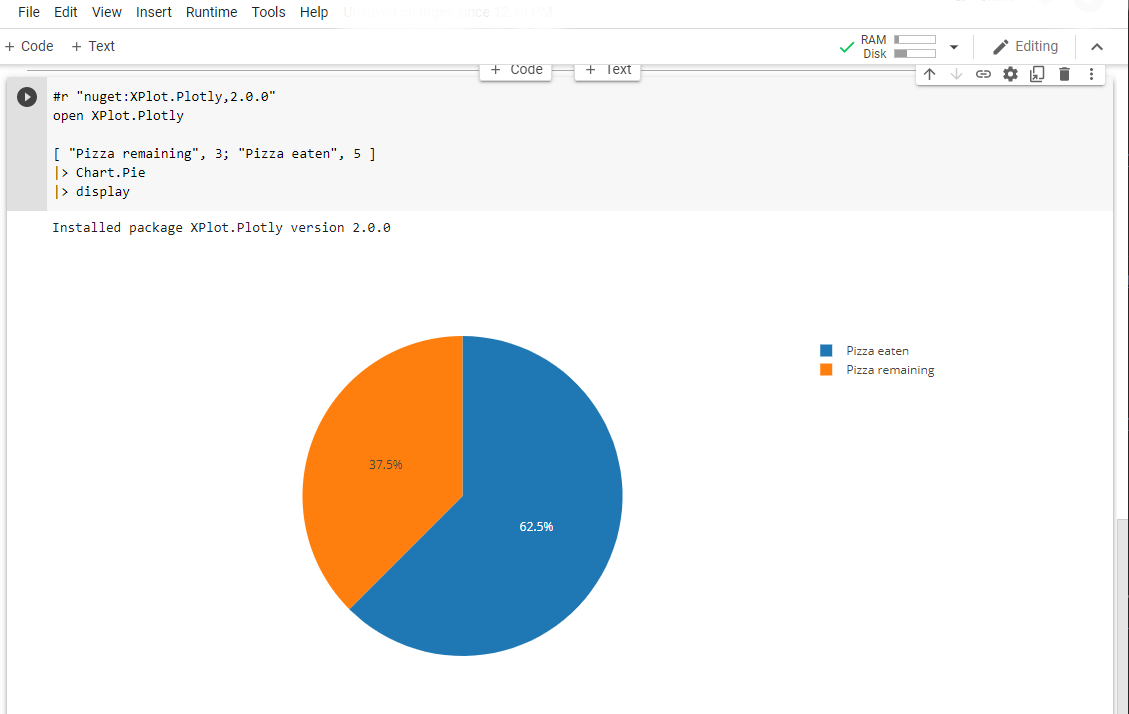
A simple F# Notebook example is below:


Sunday, February 7, 2021

F# in Google Colab Notebooks

.NET Interactive

.NET Interactive is a tool provided by Microsoft which among other things makes it easy to use .NET (C#, F#, and PowerShell) in Jupyter Notebooks.

Google Colab

Google Colab is a free, cloud hosted Jupyter notebook environment that includes access to GPUs. The Colab environment provides kernels for R, Python 2, Python 3, and Swift by default.

F# on Colab

Colab doesn't currently offer a streamlined option for adding additional kernels. However, enabling .NET via .NET Interactive is relatively easy to accomplish.

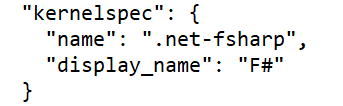
1. In Colab upload an IPython Notebook (*.ipynb) file that includes the kernelspec set to ".net-fsharp"


2. Execute code to install the .NET SDK and .NET Interactive. Wait for all steps to complete. Note: A message will appear indicating that .net-fsharp is an unrecognized runtime. This can be ignored.

3. In the Colab File menu, select "Runtime" -> "Change runtime type" then "Save" on the resulting popup window.

4. You can now execute F# in new code cells. 


A Gist with the full example is below:


Sunday, November 30, 2014

Evolution of the F# Empty WPF Template

Back in March 2012, I announced that the F# Empty WPF project template had been enhanced to include a type provider from the FSharpx type providers collection. Today, another evolution of the F# Empty WPF template has occurred. The FSharpx.TypeProviders.Xaml type provider has been replaced with Reed Copsey's FsXaml for WPF type provider.

Building a Simple Example:

It's very easy to get started with the latest version of the template as well as FsXaml. Here the steps to create an overly simple example with the new version of the template, FxXaml and FSharp.ViewModule.Core (which is also inclueded in the template):

1. Create a new project with the latest version of the F# Empty Windows App (WPF) template.
2. Build the project and Enable the type provider when requested to do so. You can now run the project, which at this point simply displays a blank screen.
3. Open the MainWindow.xaml.fs file and replace the contents with the following:


4. Open the MainWindow.xaml file add the following to the Grid element:


After this change, the MainWindow.xaml file will look something like the following with one small different depending on what you named your project:


For additional examples checkout the demos in the FsXaml GitHub repo.

Sunday, November 2, 2014

New Project Templates in the F# MVC 5 Package

There is a new version of the F# MVC 5 VSIX that contains two new templates (built by Ryan Riley) to get you started with web projects built on Owin and Katana: Web API 2.2 and Katana 3.0 and Web API 2.2 and Katana 3.0 (Empty).

To use these new templates, simply install the latest version of the package and create a new project.


Monday, July 14, 2014

Improvements to the F# Web Templates


There has been quite a bit of activity with various F# web templates over the last few months. This post will cover several of these activities.

ServiceStack Templates:

Kunjan Dalal and I have released version 2 of the ServiceStack templates. This version includes 4 new templates that target version 4 of ServiceStack. You can find the latest at http://visualstudiogallery.msdn.microsoft.com/278caff1-917a-4ac1-a552-e5a2ce0f6e1f.

MVC 5 Templates:

There are now 2 new "empty" templates available in the latest release of the package available at http://visualstudiogallery.msdn.microsoft.com/39ae8dec-d11a-4ac9-974e-be0fdadec71b. There have also been several fixes and enhancements provided by various members of the F# community.

- Patrick McDonald improved the default serialization of the MVC5 and Web API templates so that an "@" character is no not appended to the end of JSON property names.
- Functionality has been added to appropriately handle cancellation of a template creation request
- The necessary changes have been made to allow NuGet restore to work for projects created from this template

Web Item Templates: 

Last but not least, the Web Item Templates have been enhanced to support Visual Studio Express 2013 for Web.

Monday, April 21, 2014

F# Support for Web Projects

In December of last year, I announced a few templates that made it easy to create pure-F# MVC 5 and Web API 2 projects in Visual Studio 2012 and 2013. In a parallel stream, the F# team was working closely with the F# community to improve the F# web development experience by adding features such as publish-to-web. It's exciting to see that this great work is now available as a Visual F# Tools Preview. You can read more about this at http://blogs.msdn.com/b/fsharpteam/archive/2014/04/06/towards-web-project-support-in-the-visual-f-tools.aspx. This, as well as the recent announcement regarding the acceptance of contributions to the Visual F# Tools, is a huge step forward in the evolution of web development with F#.


Thursday, April 10, 2014

TypeScript in First-Class F# Web Projects

I was recently asked about how best to use TypeScript within a pure F# web project. Currently, there are two steps that are needed to make this happen. 

1. Add the TypeScript item template by downloading and installing the latest version of the F# Web Item Templates extension from http://visualstudiogallery.msdn.microsoft.com/f1dae7fe-1ecc-4f1b-86b5-32a2970d012a.


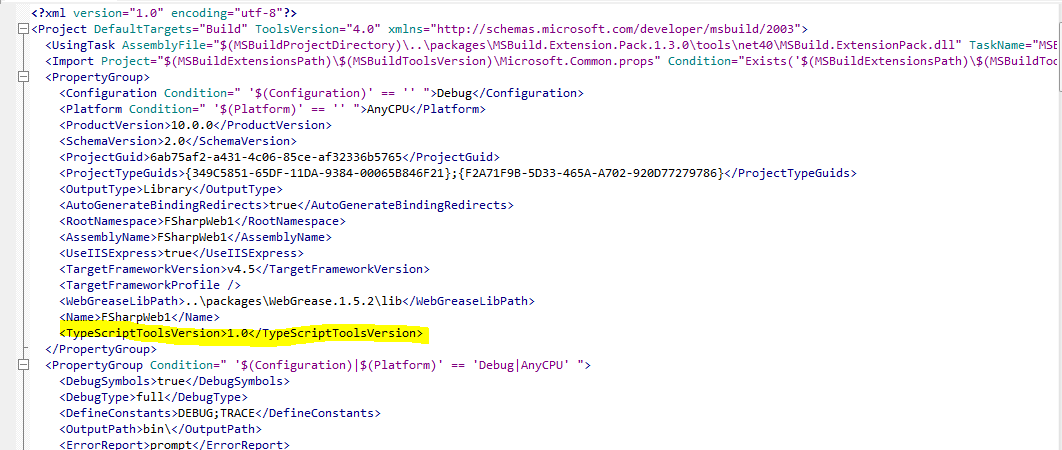
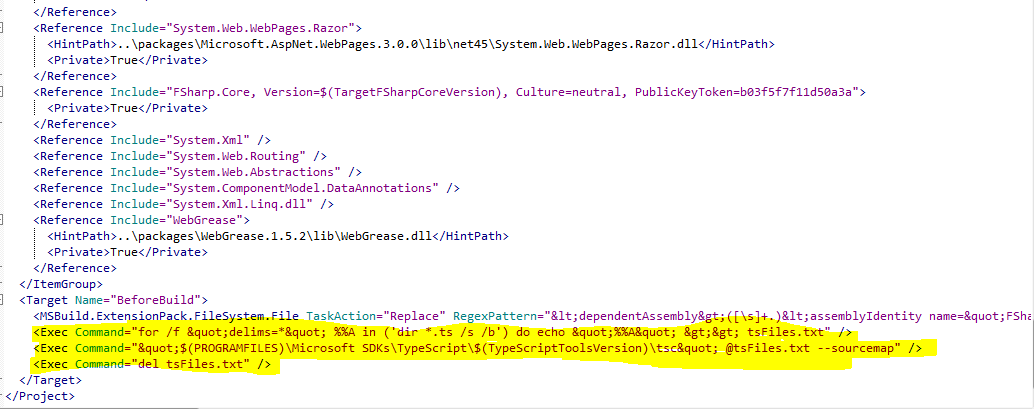
2. Modify your project file to allow the TypeScript files to compile to JavaScript when the project is compiled. To do this, you need to do the following:

- Edit your fsproj file. 

- Add the TypeScriptToolsVersion element and specify the appropriate TypeScript version that you have installed.


- Add 3 new commands to the BeforeBuild target.


- Save and re-open your project. You should now be good to go.


I plan to work on a solution to reduce the pain of step 2 in the near future, so stay tuned...


Tuesday, February 4, 2014

Running D3 in Node.js on Windows without Python

If you do a quick search on running D3 in Node.js, several great examples show up. Once such example is http://mango-is.com/blog/engineering/pre-render-d3-js-charts-at-server-side.html. Unfortunately, the D3 NPM package has a dependency on the jsdom NPM package, which has a dependency on Contextify, which has a dependency on Python and C++. While this isn't that big of a deal, it does add some complexity to getting setup in a Windows environment. Luckily, there is an NPM package named jsdom-nogyp that removes the dependency on Contextify.

Here are the steps to get that previously mentioned example up and running with jsdom-nogyp:

1. Create a directory for your app and add the D3.min.js file to it.

2. Install the jsdom-nogyp NPM package with the command "npm install jsdom-nogyp".

3. Create a new file named test.js and add the following code within it. This code is basically a merge of the original example and the index.js file from the D3 code-base.

4. You can now run the test with the command "node test.js".


Monday, January 13, 2014

A Project Template Wizard Via NuGet

It's hard to believe that more than a month has gone by since the pure F# MVC 5/Web API 2 and pure F# Nancy templates were released. One of the known issues with these templates was that they didn't appear in the Visual Studio Online Templates search. I'm happy to say that this issue has been resolved.


The approach taken to address this issue involved a custom implementation of IWizard and a simple WPF dialog. While I've created several of these in the past, until now it never seemed practical to create anything that could easily be reused.

There is now a NuGet package with ID MultiProjectWizard that can be used to provide multiple templates in a single VSIX without having to give up Online Template search functionality. Here are the steps (Note: These steps assume that you are using SideWaffle, though this NuGet package has no dependency on SideWaffle):

1. Setup your solution as if it were a multi-project template by placing each template in it's own folder with the *.vstemplate file named as MyTemplate.vstemplate. Include an _definitions folder in the parent folder and create a <language>.vstemplate file within it. See https://github.com/fsharp/FSharpCommunityTemplates/tree/master/VisualStudio/Mvc5/TemplatePack/ProjectTemplates/Web for an example of how to setup the folder structure.

2. Make the XML in the _defintiions/<language>.vstemplate file similar to the following and update the TemplateData appropriately.


3.Update the WizardData/Projects child elements appropriately. Each element represents one of the templates that was included in it's own folder in step #1. Here's a description of the attributes for the ProjectInfo element:

  • folderName = This is the name of the folder created in step #1 that is associated with the template. The IWizard implementation will look into this folder and try to find a file with a name of MyTemplate.vstemplate.
  • displayText = This is the text that will display in the WPF window for this particular template.
  • icon = There are two options for icon: "FSharp" and "Generic". If you choose F#, then the icon for that template with include the text "F#", else it will not.  

4. Install the MultiProjectWizard NuGet package. Note: This package includes DLLs such as EnvDTE and EnvDTE80. If your project already includes these DLLs, then you may need to remove the duplicate References after installing this package.

5. Lastly, add the MultiProjectDialog.dll and MultiProjectTemplateWizard.dll files as Assets to the source.extension.manifest file (as an Assembly with "File on filesystem" as the source):


You can now try out your template. If all has gone well, you'll see a screen that looks something like this:


Tuesday, December 31, 2013

Simple.Web and ServiceStack Templates

Back in November I blogged about a new home for the F# community project templates. Since that time there has been a flurry of activity in this new home. Two of the most recent additions include a template for creating Simple.Web apps and one for creating a self-hosted ServiceStack service. Both of these templates were built with the help of SideWaffle.

Simple.Web:

Simple.Web is a REST-focused, object-oriented Web Framework for .NET built by Mark Rendle. James D'Angelo recently published a pure F# template that helps you get started with Simple.Web. You can find it at http://visualstudiogallery.msdn.microsoft.com/bbec75fa-0f31-47e9-a8ce-c301edb2fa4b.


ServiceStack:

ServiceStack is a framework for building simple and fast web services on .NET and Mono. Kunjan Dalal and I recently released a template for kick-starting a self-hosted ServiceStack service. Other ServiceStack template options will be included in this package soon, so stay tuned.


Find Out More:

If you want to learn more about web development with F#, head over to FSharp.org. If you'd like to get involved, clone https://github.com/fsharp/FSharpCommunityTemplates and start hacking. If you're new to SideWaffle, I also recommend watching the introduction video at http://sidewaffle.com/. It's now easier than ever before to create a template with SideWaffle.

As always, feel free to reach to me if you have any questions.

Friday, December 27, 2013

Tuesday, December 17, 2013

Getting Started with Azure, Node.js, and FogJS on Windows

About a month ago I introduced FogJS. On the main FogJS site, there are a couple of code examples that you can use to quickly start interacting with Blob Storage, Table Storage, or the Azure Service Bus. However, if you're new to using Azure from Node.js, then you may be wondering what other steps need to be done to get a dev environment up and running. While you can glean the steps by reading various How-To Guides provided on the Azure site, it can sometimes be helpful to have the process described in a slightly different way. In this post, I'll show you how to quickly get a Windows machine setup to interact with Emulator Table Storage using FogJS. I'll follow a similar structure as the Node.js Getting Started Guide and a few of the steps between this post and that guide overlap. Some of the key differences include the use of a WorkerRole rather than a WebRole, the use of the emulator, and of course the use of FogJS.

Setting up Your Windows Machine:

1. Install Node.js from http://nodejs.org/.
2. Install the Windows Azure SDK for Node.js (this may require a reboot).
3. Open a PowerShell command prompt and navigate to the parent location at which you wish to create a project. I'll use c:\Temp for this example.


4. Run the following command to create a couple of starter files for your project (note: FogJSExample should be replaced with the name of the project that you wish to create).

New-AzureServiceProject FogJSExample


6. Navigate to the FogJSExample directory and install FogJS with the command:

npm install fogjs


5. Create a worker role with the following command (note: TableStorageWorker should be replaced with the name of the worker that you wish to create).

Add-AzureNodeWorkerRole TableStorageWorker


7. Navigate to the TableStorageWorker directory, edit the server.js file, and replace the text within it with the following:

8. Set your environment to use the Azure Storage Emulator for Table Storage with the following command (note: You can verify that this command is set with the command ls env:EMULATED).

$env:EMULATED = "true"


9. Run the following command to start the Azure Emulator (note: The emulator does not support Service Bus interaction. For working with Azure Service Bus, you will need to setup environment variables as defined here).

Start-AzureEmulator


10. Open a browser and navigate to http://localhost:81. This will cause a request to go to your Node service. When that request is received, a record is created in Table storage, then retrieved and used to populate the output that will be displayed, and finally deleted.


That's all there is to it. You can find the source for FogJS on my GitHub.

Sunday, December 8, 2013

A Few Other Template Additions and Changes of Interest

As you've probably noticed, there has been a lot of recent activity around the F# templates that have been created by various members of the F# community (here are some recent posts on some of this activity: MVC 5 Templates and F# Web Item Templates). I wanted to point out a few other new or updated templates that may be of interest to you.

Nancy Templates:

There are now 9 first-class F# Nancy templates available on Visual Studio Gallery. Here's a screenshot of what it looks like once the F# Nancy Templates package is installed:


MSTest Project Template:

We've added an AfterBuild step with the help of the MSBuild Extension Pack to the MSTest Project Template so that binding redirects are appropriately handled in both VS2012 and VS2013.

FSharpTest Template:

Jack Fox has updated his FSharpTest template to support VS2013 in addition to the previously supported VS2012. You can read more information about the FSharpTest template at http://jackfoxy.com/fsharptest/.


Tuesday, December 3, 2013

A New F# ASP.NET MVC 5 and Web API 2 Project Template

There is a new project template now available on Visual Studio Gallery for VS2012 and VS2013. This template provides a single F# project with ASP.NET MVC 5 + Web API 2.

To get the most out of this template, it is recommended that you follow the steps defined in this blog post as well as install the F# Web Item Templates. After the template is installed, you can find it under Visual F# | Web | ASPNET.


A big thanks goes out to Sayed I. Hashimi and Mads Kristensen for adding F# support to SideWaffle! SideWaffle reduced the time that it would have normally taken to create this template and it is sure to reduce time and headaches for future maintenance. I'd also like to thank Ryan Riley for contributing much of the initial project that was used to create this template.

If you'd like to contribute, visit https://github.com/fsharp/FSharpCommunityTemplates for information on how to get involved.

Monday, December 2, 2013

New F# Web App Item Templates

There is a new VSIX available on Visual Studio Gallery that can help in the creation of first-class F# ASP.NET MVC and Web API projects. To see the new item templates, do the following:

1. Follow the steps defined in this post.

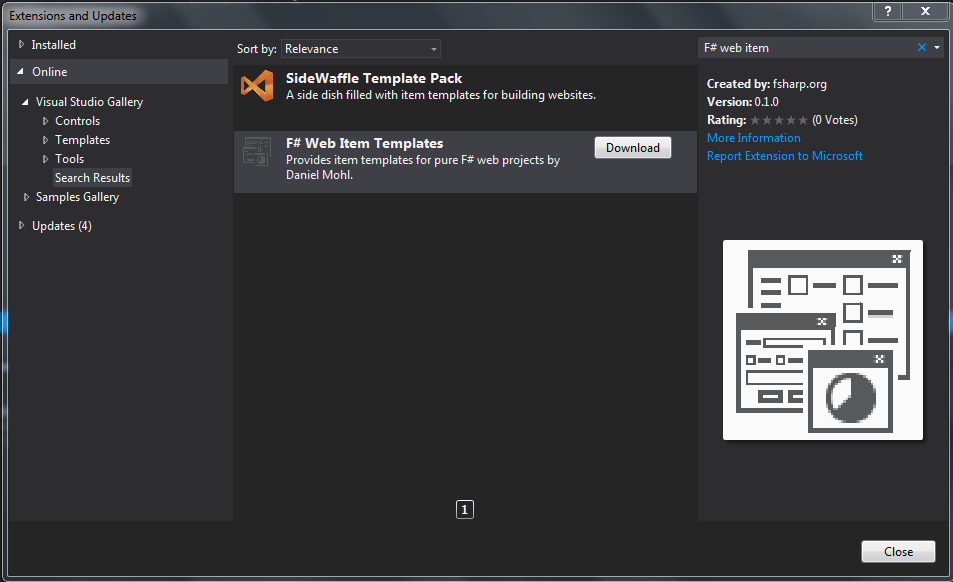
2. Install the VSIX from here or search for it and install from Tools | Extensions and Updates...


3. Restart Visual Studio and create or open a first-class F# ASP.NET MVC or Web API project. If you don't have one handy, you can get an MVC 5/Web API 2 template from here or install this sneak peak of one of the F# Nancy templates that Ryan Riley and I are working on.

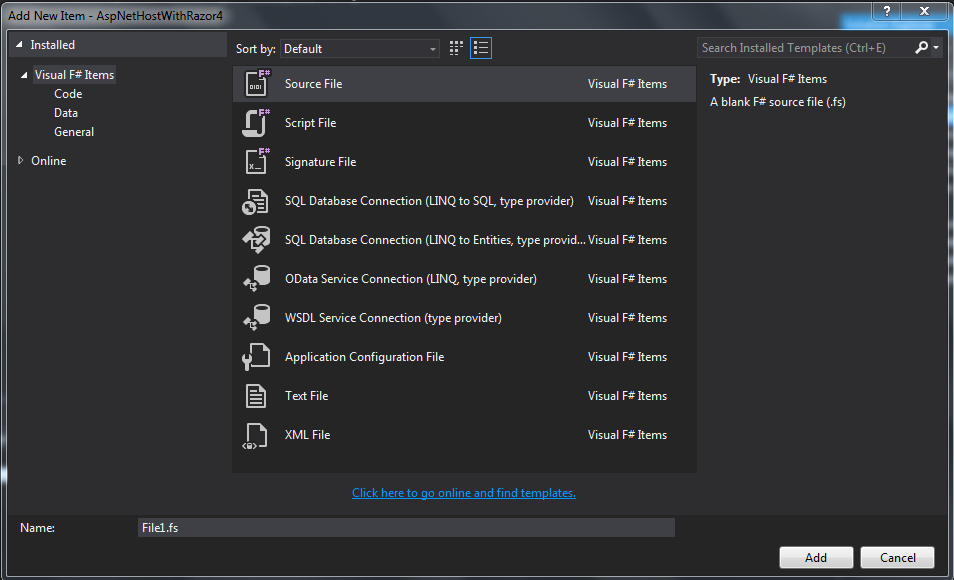
4. Add a new item (Ctrl+Shift+A) and select the Web subcategory. You should see the following:

Saturday, November 30, 2013

Adding New Items to a Pure F# ASP.NET MVC/Web API Project

UPDATE 12/15/2013:
-----------------------

The F# community has been working hard on ways to make this process easier. To that end, here are the new and improved instructions:

Option 1: Visual Studio Project Template Option:

The easiest option is to simply install the latest version of either the F# MVC 5 template or the F# Nancy template. These templates now include a custom NuGet package that contains an Install.ps1 file that will automatically add the needed registry entries.

Option 2: PowerShell Option:

If you prefer to run the PowerShell file manually, you can do the following:

1. Launch PowerShell (you may need to run PowerShell as administrator).
2. Download the AddRegistryEntries.ps1 file and execute it with the command ./AddRegstryEntries.ps1

Option 3: Batch File Option:

If you don't want to use PowerShell, there is also a batch file option.

1. Download the AddRegistryEntries.bat file.
2. Run the batch file as administrator.

You should now be able to see the items shown in step #5 of the original post. Don't forget to checkout the F# Web Item Templates as well.

-----------------------

A few months ago Mark Seemann put together a great post on how to create a pure F# ASP.NET Web API project. One of the biggest disadvantages mentioned in that post is that once the necessary changes are made to the ProjectTypeGuids element in the fsproj file, the Add New Item wizard no longer displays items. After much trial and error, I've found a fix for this issue.

Note: While the change mentioned here is pretty mild, the standard registry edit disclaimer still applies. It's recommended that you backup your registry before making changes as incorrect changes/additions/deletions can have serious and unexpected consequences.

Here are the steps for VS2013 (for VS2012 the steps should be similar, but with a slightly different registry path).

1. Edit the registry (e.g. run regedit.exe).

2. Locate HKEY_LOCAL_MACHINE or HKEY_LOCAL_USER then \SOFTWARE\Microsoft\VisualStudio\ then 12.0 or 12.0_Config then \Projects\

3. Find {349C5851-65DF-11DA-9384-00065B846F21}. If there is more than one, find the one with LanguageTemplates as the child. 

4. Add a new String Value entry to the LanguageTemplates node with a key and value of {F2A71F9B-5D33-465A-A702-920D77279786}.


5. Test it out by closing all instances of VS, creating a pure F# ASP.NET MVC or Web API project, and trying to add a new item. You should now see all of the usual F# item templates.


If you want to try this out without having to manually create a pure F# ASP.NET MVC or Web API project, here's a sneak peak of one of the F# Nancy templates that Ryan Riley and I are working on. Look for the full collection of F# Nancy templates in the next few weeks. You can get involved with the Nancy templates by contributing to https://github.com/fsharp/FSharpCommunityTemplates/tree/master/VisualStudio/Nancy.Templates.

Monday, November 18, 2013

Announcing FogJS for Windows Azure with Node.js

About a year and a half ago I announced a library named Fog (for F#) that had the goal of making it very easy to use F# to work with the Windows Azure API for .NET. Today, I'm proud to announce the release of FogJS, which has a similar goal for JavaScript/Node.js development.

FogJS:

FogJS currently supports 3 of the more popular Azure services: Blob Storage, Table Storage, and Service Bus. One of the most broad features in FogJS is that of support for promises. In fact, almost every function provided by the Azure SDK for Node.js has been replicated in Fog with the results returned as a promise (with the help of Q.js).

The second big feature is related to making it as easy as possible to interact with Azure. This is primarily accomplished with "simplified functions" that follow a convention over configuration approach.

Example: 

Here's a quick example of one option for how to use Blob Storage with FogJS:

You can find examples for Table Storage and Service Bus interaction on the main FogJS site: http://fogjs.azurewebsites.net/.

As usual, the code and tests can be found on my GitHub.

Monday, November 11, 2013

A Few Changes to the F#/C# MVC 4 Project Template

There is a new version (v1.21) of the F#/C# MVC 4 project template. There are two new features worth noting in this release:

1. The AutoGenerateBindingRedirects attribute has been added to all of the project files. This attribute (that is newly available in .NET 4.5.1/VS2013) removes the need to constantly add or update binding redirects in your web.config or app.config files. This eliminates the errors that you often see when the binding redirect elements were missing in config files such as "System.MissingMethodException : Method not found...".

2. The project creation wizard now has an option to include FsUnit for NUnit or xUnit within the Test project. We plan to include MS Test as well as options without FsUnit in a future release.


Wednesday, November 6, 2013

A New Home for the F# Community Project Templates


While at the Progressive F# Tutorials last week Don Syme and I worked together to create a new home for the community F# project templates. They can now be found under the F# Open Source Community GitHub org at https://github.com/fsharp/FSharpCommunityTemplates.

We would love to have you add to these templates. Simply follow the instructions in the readme file and submit a pull request.