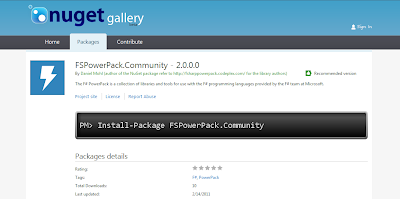
Building the Package:
1. Create a metadata file called FSPowerPack.Community.nuspec to describe the package. The contents of this file are shown below:
<package xmlns:xsd="http://www.w3.org/2001/XMLSchema" xmlns:xsi="http://www.w3.org/2001/XMLSchema-instance">
  <metadata xmlns="http://schemas.microsoft.com/packaging/2010/07/nuspec.xsd">
    <id>FSPowerPack.Community</id>
    <version>2.0.0.0</version>
    <authors>Daniel Mohl (author of this NuGet package) refer to       http://fsharppowerpack.codeplex.com/ for the library authors</authors>
    <requirelicenseacceptance>true</requirelicenseacceptance>
    <description>The F# PowerPack is a collection of libraries and tools for use with the F# programming languages provided by the F# team at Microsoft.</description>
    <summary>
 The additional libraries in the F# PowerPack are functionality which is not part of the core F# release, but enables some development scenarios with F#. The PowerPack include features such as a basic Matrix library and supporting math types, FsLex and FsYacc tools for lexing and parsing, support for using F# with LINQ-based libraries, and a tool for generating HTML documentation from F# libraries. This functionality, which has previously been available in the F# CTP releases, is now available on CodePlex. The F# PowerPack will continue to evolve seperately from the main F# releases, and the features will continue to be improved and iterated upon.
    </summary>
    <language>en-US</language>
    <projecturl>http://fsharppowerpack.codeplex.com/</projecturl>
    <licenseurl>http://fsharppowerpack.codeplex.com/license</licenseurl>
  </metadata>
  <files>
   <file src="Lib\*.*" target="Lib"/>
   <file src="Lib\Net20\*.*" target="Lib\Net20"/>
   <file src="Lib\Net40\*.*" target="Lib\Net40"/>
   <file src="Lib\sl3\*.*" target="Lib\sl3"/>
   <file src="Lib\sl4\*.*" target="Lib\sl4"/>
   <file src="Tools\*.*" target="Tools"/>
   <file src="Content\*.*" target="Content"/>
  </files>
</package>
The following list provides a little bit of additional information surrounding a few of the elements that may not be completely obviously during the initial viewing of the file.id - The id element needs to match the package id that is or will be registered on the NuGet Gallery. It is the primary means by which users will locate and retrieve your package.
version - The version element defines the version of this particular configuration and is one of the keys that others can use to create dependencies on your package. Additionally, the NuGet Gallery will only allow uploads of the same package if the version has been modified.
files - This element should contain a file element for each directory and/or sub-directory that has content that should be included in the package.
2. Create the "Lib", "Content", and "Tools" directories in the same directory that contains the FSPowerPack.Community.nuspec file.
3. Place the files that you plan to distribute into these newly created directories. Information related to the types of files that each of these directories should contain is defined below:
Lib - Contains any libraries that will be added to the project as a reference. The Lib folder can contain sub-folders that allow targeting of specific frameworks such as Net11, Net20, Net40, sl3, and/or sl4. In the case of FSPowerPack.Community the appropriate framework DLLs were added to folders named Net20, Net40, sl3, and sl4.
Content - Contains any source files that you wish to add to the project during package installation. The source file names follow a convention of {file name}.{file extension}.pp. For the FSPowerPack.Community package, there is only one F# source file that should be included. It is named FSPowerPack_Example.fs.pp and the contents of the file are shown below (Note: This source code is from the F# PowerPack CodePlex page - http://fsharppowerpack.codeplex.com/):
module FSPowerPowerExample

open System

let v  = vector [1.0;1.0;1.0] + vector [2.0;2.0;2.0] // (3.0; 3.0; 3.0)
let c = complex 0.0 1.0 * complex 0.0 1.0 // -1r+0i
let r = (1N/2N) * (1N/3N) // 1/6
Tools - Contains any files that you wish to include with the package, but that should not be added as references to the project. This directory can also contain a few specially named PowerShell scripts (i.e. Init.ps1, Install.ps1, Uninstall.ps1) that provide hooks into the install/uninstall processes. In the case of FSPowerPack.Community, there wasn't a need to include any of the PowerShell scripts; however, several additional DLLs and EXEs were included that may be useful in various scenarios.
4. Create the nupkg file by running a command with the nuget.exe tool found at http://nuget.codeplex.com/releases/view/55760. The output file name follows the convention of {id from the nuspec file}{version from the nuspec file}.nupkg. The command used to create the FSPowerPack.Community.nupkg file was:
nuget.exe pack c:\git\FSPowerPack.Community\FSPowerPack.Community.nuspec -b c:\git\FSPowerPack.Community -o c:\git\FSPowerPack.Community
5. Test all scenarios locally (visit "Hosting Your Own Local and Remote NuPack Feeds" for information on how to setup a local feed)
6. If you don't have a NuGet gallery account, go to the nuget.org site and register. Follow the instructions in the confirmation email to be granted access as a contributor. Once you have an account, follow the process for uploading your *.nupkg file to the NuGet Gallery.
7. Test all scenarios once more with the NuGet Gallery as the source.
Conclusion:
This blog post walks you through the steps that were needed to create the FSPowerPack.Community NuGet Package. There are a number of additional options and featured available to a NuGet package author and new features/functionality are being added all of the time. Check out the NuGet CodePlex site (http://nuget.codeplex.com/) to find out more. Hopefully, this will give you the tools to start building your first F# NuGet package. I look forward to trying out your creation.

